mNo edit summary Tag: Visual edit |
mNo edit summary Tag: Visual edit |
||
| Line 1: | Line 1: | ||
| + | {{weapon infobox |
||
| − | == General notes == |
||
| + | |damage1=140 x 11 |
||
| + | |damage2=400 x 9 |
||
| + | |speed1=1.33 |
||
| + | |speed2=1 |
||
| + | |clip1=5 |
||
| + | |clip2=3 |
||
| + | |dps1=2053 |
||
| + | |dps2=3600 area |
||
| + | |time1=3.75 |
||
| + | |time2=3 |
||
| + | |weakspot1=50% |
||
| + | |weakspot2=- |
||
| + | |reloading time=3}} |
||
| + | == Overview == |
||
| − | *There are 16 different weapons - 8 from the base game & 8 from the [[Downloadable Content|DLCs]] (two per [[Downloadable Content|DLC]]). |
||
| − | * New weapons are unlocked when reaching certain [[Player Ranks|ranks]]. |
||
| − | *Players have a total of 2 weapons slots in Campaign and Survival [[Game Modes|modes]]. In Sandbox mode up to 4 weapons can be picked. |
||
| − | *The primary weapon slot is unlocked upon reaching Level 40. Until then, players must use the character's preset weapons. |
||
| − | *If a weapon's clip is empty, the weapon will automatically reload, even if the player switches to the other weapon. Switching weapons on empty clips can reduce weapon fire downtime immensely. |
||
| − | *The values in the table are in action for the weapons in their base (default) state, without [[Tactical Juxtaposition|Tactical juxtaposition]]. If this perk is used, many of these change correspondingly. |
||
| + | * Unlocked for players, that have The Last Stand [[Downloadable Content|DLC]] at [[Player Ranks|Rank]] 36, thus making it the last weapon to be unlocked in Sanctum 2. |
||
| − | == Table of weapons == |
||
| + | * Fire modes |
||
| − | {| class="wikitable" width="100%" style="text-align:center" |
||
| + | ** Primary Fire |
||
| − | |- |
||
| + | *** Fires a small, gravity-affected explosive at high velocity, that sticks to enemies and deals delayed damage. |
||
| − | ! colspan="2" | Weapon !! Fire Mode !! Damage !! width="60px" | Weakspot Damage Bonus !! width="75px" | Shots per Second !! width="100px" | Magazine Size !! Damage per Second |
||
| + | **** Several can be attached to the same enemy. However, they will not detonate if they hit non-enemy objects - if the primary fails to hit an enemy, it will quickly fizzle-out and occasionally make a 'raspberry'-noise. |
||
| − | (DPS) |
||
| + | *** Although this mode is described as "small explosions", it has no AoE - it is fully single-targeted and is unaffected by the AoE-bonus of [[Long Range Specialization]]. |
||
| − | ! width="70px" | Sustained Fire Time (seconds) !! width="60px" | Required Player Rank |
||
| + | ** Secondary Fire |
||
| − | !Reloading |
||
| + | *** Launches a heavier, slower cluster-bomb that will detonate two seconds after impact, dealing high area damage over time in a large zone. Like with all explosions in the game, the damage is highest in the center and the further from it, the lesser it goes. |
||
| − | time |
||
| + | *** Unlike the primary, it will not stick to enemies, and if hits such, it will bounce-off, which can even lead to the projectile going far away from them. |
||
| + | *** Carefully placed bombs with the secondary fire can hit [[Hoverer|Hoverers]] soft back (but not earning weakspot hits) for moderate damage. |
||
| + | <br /> |
||
| − | (seconds) |
||
| + | ==Trivia== |
||
| − | |- |
||
| + | * ''Smatterband'' is a Swedish term for a kind of firecracker, which seems to be what this weapon is inspired by. |
||
| − | ! colspan="10" style="font-size:150%" | Base Game Weapons |
||
| + | * Despite it being called an "industrial weapon" on the [http://store.steampowered.com/app/237090/ Steam Store], there is no practical industrial application for launching sticky firecracker bombs. |
||
| − | ! |
||
| + | * When the Smatter Band was originally released, [[Long Range Specialization]] inadvertently caused its secondary's AoE to completely encompass most maps, resulting in the single largest AoE ever witness. However, this spectacle was short lived, as it was resolved a few days later. ''(See [[Game Updates#18 December 2013|Game Updates]])'' |
||
| − | |- style="height:36px" |
||
| − | | rowspan="2" |[[File:Voltaic Hand Cannon.png | 72px | center | link=Voltaic Hand Cannon]]|| rowspan="2" |[[Voltaic Hand Cannon]]||'''Primary'''|| 750 || 20% || 2 || 6 || 1500 per enemy || 3 || rowspan="2" | 1 |
||
| − | | rowspan="2" |2.5 |
||
| − | |- |
||
| − | |'''Secondary'''|| 1000 || 20%|| 1.5 || 6 || 1500 || 4 |
||
| − | |- |
||
| − | ! colspan="10" | |
||
| − | ! |
||
| − | |- style="height:36px" |
||
| − | | rowspan="2" |[[File:Battle Rifle.png | 72px | center | link=Battle Rifle]]|| rowspan="2" |[[Battle Rifle]]||'''Primary'''|| 850 || 50% || 1.67 || 5 || 1417 area || 3 || rowspan="2" | 5 |
||
| − | | rowspan="2" |2.5 |
||
| − | |- |
||
| − | |'''Secondary'''|| 2000 || -|| 1.5 || 3 || 3000 area || 2 |
||
| − | |- |
||
| − | ! colspan="10" | |
||
| − | ! |
||
| − | |- style="height:36px" |
||
| − | | rowspan="2" |[[File:ETK-Tesla Prototype.png | 72px | center | link=ETK-Tesla Prototype]]|| rowspan="2" |[[ETK-Tesla Prototype]]||'''Primary'''|| 125 || 25% || 10 || 45 || 1250 per enemy || 4.5 || rowspan="2" | 8 |
||
| − | | rowspan="2" |2.5 |
||
| − | |- |
||
| − | |'''Secondary'''|| 700 || 50%|| 1.5 || 3 || 1050 per enemy || 2 |
||
| − | |- |
||
| − | ! colspan="10" | |
||
| − | ! |
||
| − | |- style="height:36px" |
||
| − | | rowspan="2" |[[File:Sub Mini-Gun.png | 72px | center | link=Sub Mini-Gun]]|| rowspan="2" |[[Sub Mini-Gun]]||'''Primary'''|| 112 || 25% || 20 || 80 || 2240 || 4.0 || rowspan="2" | 14 |
||
| − | | rowspan="2" |3.0 |
||
| − | |- |
||
| − | |'''Secondary'''|| 45 initial + (55 x 25 poison ticks) |
||
| − | = 1420 total, of which 1375 posion<br /> |
||
| − | | 30% (initial hit)|| 2 || 4 || 2840 || 2 |
||
| − | |- |
||
| − | ! colspan="10" | |
||
| − | ! |
||
| − | |- |
||
| − | |- style="height:36px" |
||
| − | | rowspan="2" |[[File:Assault Rifle.png | 72px | center | link=Assault Rifle]]|| rowspan="2" |[[Assault Rifle]]||'''Primary'''|| 180 || 50% || 10 || 36 || 1800 || 3.6 || rowspan="2" | 1 (with [[Skye Autumn|Skye]]) |
||
| − | 20 (with other characters) |
||
| − | | rowspan="2" |2.5 |
||
| − | |- |
||
| − | |'''Secondary'''|| 1250 || 10%|| 1.33 || 2 || 1663 area || 1.5 |
||
| − | |- |
||
| − | ! colspan="10" | |
||
| − | ! |
||
| − | |- style="height:36px" |
||
| − | | rowspan="2" |[[File:Shotgun.png | 72px | center | link=Shotgun]]|| rowspan="2" |[[Shotgun]]||'''Primary'''|| (0 to 240) x 9 pellets |
||
| − | = 0 to 2160 in total |
||
| − | | 25% || 1.5 || 6 || 0 to 3240 || 4 || rowspan="2" | 1 (with [[Haigen Hawkins|Haigen]]) |
||
| − | 20 (with other characters) |
||
| − | | rowspan="2" |4 |
||
| − | |- |
||
| − | |'''Secondary'''|| (2 to 6 charges) x (0 to 240) x 9 pellets |
||
| − | = 0 through 4320 to 12960 in total |
||
| − | | 25%|| 0.5 to 0.17 || 3 to 1 || 0 to 2160 || 6 |
||
| − | |- |
||
| − | ! colspan="10" | |
||
| − | ! |
||
| − | |- style="height:36px" |
||
| − | | rowspan="2" |[[File:Sniper Rifle.png | 72px | center | link=Sniper Rifle]]|| rowspan="2" |[[Sniper Rifle]]||'''Primary'''|| 1200 || 130% || 1.33 || 4 || 1600 || 3 || rowspan="2" | 1 (with [[SiMo]]) |
||
| − | 20 (with other characters) |
||
| − | | rowspan="2" |3 |
||
| − | |- |
||
| − | |'''Secondary'''|| 1200 || 130%|| 1.33 || 2 || 1600 cone || 1.5 |
||
| − | |- |
||
| − | ! colspan="10" | |
||
| − | ! |
||
| − | |- style="height:36px" |
||
| − | | rowspan="2" |[[File:REX.png | 72px | center | link=REX]]|| rowspan="2" |[[REX]]||'''Primary'''|| 1200 || 30% || 1.17 || 3 || 1400 area || 2.57 || rowspan="2" | 1 (with [[Sweet Autumn|Sweet]]) |
||
| − | 20 (with other characters) |
||
| − | | rowspan="2" |3.5 |
||
| − | |- |
||
| − | |'''Secondary'''|| 300 x 7 missiles per charge |
||
| − | (= 2100 to 6300 in total) |
||
| − | | 30%|| 1.5 || 3 || 3150 area || 2 |
||
| − | |- |
||
| − | ! colspan="2" | Weapon !! Fire Mode !! Damage !! width="60px" | Weakspot Damage Bonus !! width="75px" | Shots per Second !! width="100px" | Magazine Size !! Damage per Second !! width="70px" | Sustained Fire Time (seconds) !! width="60px" | Required Player Rank |
||
| − | !Reloading |
||
| + | <br /> |
||
| − | Time |
||
| + | ==Notes & tactics== |
||
| + | * The explosion of both attacks are somewhat delayed, so the player should consider it, especially with the secondary fire. |
||
| − | (seconds) |
||
| + | * This weapon is very effective against [[Soaker|Soakers]], since the delayed explosions quickly render them more vulnerable. |
||
| − | |- |
||
| + | *The secondary fire mode is effective vs crowds with slow to average movement speed that have no or low armour like [[Walker|Walkers]], [[Jumper|Jumpers]] and [[Rhino|Rhinos]] in the twists, although it finds some more trouble with fast enemies such as [[Runner|Runners]] & [[Brood Mother|Brood Mothers]] and it hardly deals damage to heavily armoured lumes such as [[Heavy Pup|Heavy Pups]] and [[Armoured Heavy|Armoured Heavies]]. |
||
| − | ! colspan="10" style="font-size:150%" | Road to Elysion Weapons |
||
| + | *Using this weapon with [[Hip Fire]] is dual-edged, since this perk would reduce a bit the primary fire's crit damage to weakspots. |
||
| − | ! |
||
| + | *It is difficult to deal with [[Bliskeblaske|Bliskeblaskes]] with this weapon, since their defensive state would trigger quickly, resulting in almost no damage dealt, unless the [[Armor Shredder]] perk is used. |
||
| − | |- style="height:36px" |
||
| − | | rowspan="2" |[[File:Gatling Laser.png | 72px | center | link=Gatling Laser]]|| rowspan="2" |[[Gatling Laser]]||'''Primary'''|| 200 + (20 x 3 ticks) |
||
| − | = 260 in total, of which 60 is DoT |
||
| − | | 30% (per shot) || 8 || 28 || 2080 || 3.5 || rowspan="2" | 18 |
||
| − | | rowspan="2" |3 |
||
| − | |- |
||
| − | |'''Secondary'''|| 1750 || -|| 1 to 0.4 || 1 to 28 || 1750 per enemy || 1 to 28 |
||
| − | |- |
||
| − | ! colspan="10" | |
||
| − | ! |
||
| − | |- style="height:36px" |
||
| − | | rowspan="2" |[[File:Ballista.png | 72px | center | link=Ballista]]|| rowspan="2" |[[Ballista]]||'''Primary'''|| 990 to 2970 || 75% || 2 to 0.5 || 6 || 1980 to 1485 || 3 to 12 || rowspan="2" | 1 (with [[TSYGAN]]) |
||
| − | 25 (with other characters) |
||
| − | | rowspan="2" |3.5 |
||
| − | |- |
||
| − | |'''Secondary'''|| (275 to 550) x 5 |
||
| − | = 1375 to 2750 in total |
||
| − | | 75% |
||
| − | (initial hit |
||
| − | | 1.33 to 0.44 || 3 || 1833 to 1222 per enemy || 2.25 to 6,75 |
||
| − | |- |
||
| − | ! colspan="10" style="font-size:150%" | Ruins of Brightholme Weapons |
||
| − | ! |
||
| − | |- style="height:36px" |
||
| − | | rowspan="2" |[[File:Circle Saw.png | 72px | center | link=Circle Saw]]|| rowspan="2" |[[Circle Saw]]||'''Primary'''|| 333 || 50% || 10 || 60 || 3333 || 6 || rowspan="2" | 21 |
||
| − | | rowspan="2" |2.5 |
||
| − | |- |
||
| − | |'''Secondary'''|| 1000 + (45 x 16 ticks) |
||
| − | = 1720 in total, of which 720 is DoT |
||
| − | | 40% (initial hit)|| 1 || 4 || 1720 || 4 |
||
| − | |- |
||
| − | ! colspan="10" | |
||
| − | ! |
||
| − | |- style="height:36px" |
||
| − | | rowspan="2" |[[File:Nailgun.png | 72px | center | link=Nailgun]]|| rowspan="2" |[[Nailgun]]||'''Primary'''|| 500 || 200% || 3.33 || 16 || 1667 || 4.8 |
||
| − | (constant firing); |
||
| ⚫ | |||
| − | 6 |
||
| − | |||
| − | (precise firing) |
||
| − | | rowspan="2" | 24 |
||
| − | | rowspan="2" |4 |
||
| − | |- |
||
| − | |'''Secondary'''|| 700 || 10%|| 2 || 8 || 1400 || 4 |
||
| − | |- |
||
| − | ! colspan="10" style="font-size:150%" | The Pursuit Weapons |
||
| − | ! |
||
| − | |- style="height:36px" |
||
| − | | rowspan="2" |[[File:Drone Launcher.png | 72px | center | link=Drone Launcher]]|| rowspan="2" |[[Drone Launcher]]||'''Primary'''|| 1600 in total per drone sent || 30% || 1.33 || 6 || 2133 || 4.5 || rowspan="2" | 29 |
||
| − | | rowspan="2" |3.5 |
||
| − | |- |
||
| − | |'''Secondary'''|| 640 area || -|| - || - || 427 to 853 area || - |
||
| − | |- |
||
| − | ! colspan="10" | |
||
| − | ! |
||
| − | |- style="height:36px" |
||
| − | | rowspan="2" |[[File:Grenade Launcher.png | 72px | center | link=Grenade Launcher]]|| rowspan="2" |[[Grenade Launcher]]||'''Primary'''|| 600 || 10% || 3.33 || 12 || 2000 area || 3.6 || rowspan="2" | 31 |
||
| − | | rowspan="2" |3.5 |
||
| − | |- |
||
| − | |'''Secondary'''|| 1000 + (300 x 8 bombs) |
||
| − | = 3400 in total |
||
| − | | 10%|| 1.33 || 6 || 4533 area || 4.5 |
||
| − | |- |
||
| − | ! colspan="10" style="font-size:150%" | The Last Stand Weapons |
||
| − | ! |
||
| − | |- style="height:36px" |
||
| − | | rowspan="2" |[[File:Plasma Rifle.png | 72px | center | link=Plasma Rifle]]|| rowspan="2" |[[Plasma Rifle]]||'''Primary'''|| 765 || 100% || 2 || 10 || 1530 || 5 || rowspan="2" | 34 |
||
| − | | rowspan="2" |2.5 |
||
| − | |- |
||
| − | |'''Secondary'''|| (500 or 2000) + 20 x (1 to 33 ticks) |
||
| − | = 520 to 2660 |
||
| − | | 10%|| 1.33 || 4 || 692 to 3990 area || 3 |
||
| − | |- |
||
| − | ! colspan="10" | |
||
| − | ! |
||
| − | |- style="height:36px" |
||
| − | | rowspan="2" |[[File:Smatter Band.png | 72px | center | link=Smatter Band]]|| rowspan="2" |[[Smatter Band]]||'''Primary'''|| 140 x 11 ticks |
||
| − | = 1500 in total |
||
| − | | 50% || 1.33 || 5 || 2053 || 3.75 || rowspan="2" | 36 |
||
| − | | rowspan="2" |3 |
||
| − | |- |
||
| − | |'''Secondary'''|| 400 x 9 blasts |
||
| − | = 3600 in total |
||
| − | | -|| 1 || 3 || 3600 area || 3 |
||
| − | |- |
||
| − | ! colspan="2" | Weapon !! Fire Mode !! Damage !! width="60px" | Weakspot Damage Bonus !! width="75px" | Shots per Second !! width="100px" | Magazine Size !! Damage per Second !! width="70px" | Sustained Fire Time (seconds) !! width="60px" | Required Player Rank |
||
| − | !Reloading |
||
| − | |||
| − | Time |
||
| − | |||
| − | (seconds) |
||
| − | |} |
||
| − | |||
| − | |||
| ⚫ | |||
Latest revision as of 21:07, 30 September 2021
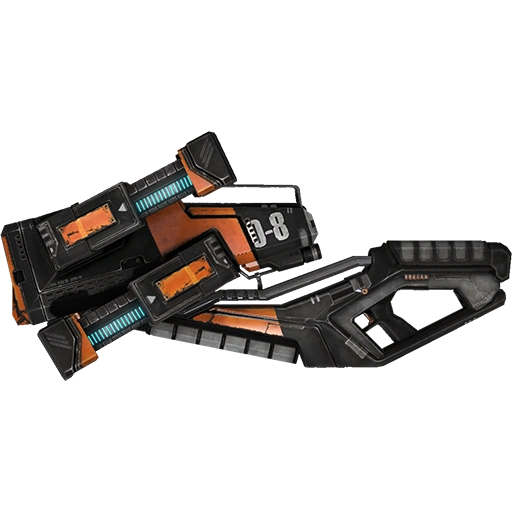
| Smatter Band | ||
|---|---|---|
| ||
| Primary Fire | Secondary Fire | |
| Damage | 140 x 11 | 400 x 9 |
| Shots per Second | 1.33 | 1 |
| Magazine Size | 5 | 3 |
| Damage per Second | 2053 | 3600 area |
| Sustained Fire Time (seconds) |
3.75 | 3 |
| Weakspot Damage Bonus | 50% | - |
| Reloading Time (seconds) |
3 | 3 |
Overview[ | ]
- Unlocked for players, that have The Last Stand DLC at Rank 36, thus making it the last weapon to be unlocked in Sanctum 2.
- Fire modes
- Primary Fire
- Fires a small, gravity-affected explosive at high velocity, that sticks to enemies and deals delayed damage.
- Several can be attached to the same enemy. However, they will not detonate if they hit non-enemy objects - if the primary fails to hit an enemy, it will quickly fizzle-out and occasionally make a 'raspberry'-noise.
- Although this mode is described as "small explosions", it has no AoE - it is fully single-targeted and is unaffected by the AoE-bonus of Long Range Specialization.
- Fires a small, gravity-affected explosive at high velocity, that sticks to enemies and deals delayed damage.
- Secondary Fire
- Launches a heavier, slower cluster-bomb that will detonate two seconds after impact, dealing high area damage over time in a large zone. Like with all explosions in the game, the damage is highest in the center and the further from it, the lesser it goes.
- Unlike the primary, it will not stick to enemies, and if hits such, it will bounce-off, which can even lead to the projectile going far away from them.
- Carefully placed bombs with the secondary fire can hit Hoverers soft back (but not earning weakspot hits) for moderate damage.
- Primary Fire
Trivia[ | ]
- Smatterband is a Swedish term for a kind of firecracker, which seems to be what this weapon is inspired by.
- Despite it being called an "industrial weapon" on the Steam Store, there is no practical industrial application for launching sticky firecracker bombs.
- When the Smatter Band was originally released, Long Range Specialization inadvertently caused its secondary's AoE to completely encompass most maps, resulting in the single largest AoE ever witness. However, this spectacle was short lived, as it was resolved a few days later. (See Game Updates)
Notes & tactics[ | ]
- The explosion of both attacks are somewhat delayed, so the player should consider it, especially with the secondary fire.
- This weapon is very effective against Soakers, since the delayed explosions quickly render them more vulnerable.
- The secondary fire mode is effective vs crowds with slow to average movement speed that have no or low armour like Walkers, Jumpers and Rhinos in the twists, although it finds some more trouble with fast enemies such as Runners & Brood Mothers and it hardly deals damage to heavily armoured lumes such as Heavy Pups and Armoured Heavies.
- Using this weapon with Hip Fire is dual-edged, since this perk would reduce a bit the primary fire's crit damage to weakspots.
- It is difficult to deal with Bliskeblaskes with this weapon, since their defensive state would trigger quickly, resulting in almost no damage dealt, unless the Armor Shredder perk is used.